disclaimer: warning!
“It might be in places like North Korea or ISIS-controlled Syria. In places like Rwanda or the USA it might make you a target of “law enforcement” authorities that don’t give a fuck about law and are more concerned with silencing enemies of The System. In places like Germany, Hungary, Czech Republic or any other reasonably sane country, you’ll be perfectly fine.
If you do live in a country that blocks Tor access, you can download Tor through the millions of mirror sites that exist. When using Tor, you can also use a bridge if they block (or monitor) tor network connections.” (src: debian wiki)
How to Host a Tor Relay Successfully?
Hello everyone. My name is MrD and today I will be teaching you on how to successfully host your own Tor relay on a Ubuntu 14.04 x64 VPS. The general method should be the same across most major Linux distros as well.
I have noticed a distinct lack of simple and clear tutorials on how to do this, so I am hoping that this will be the first mainstream one available.
The first thing you are going to want to do is run “sudo apt-get update && sudo apt-get upgrade” and accept all of the updates to the packages. This just makes sure we have the most up to date software for your systems security.
![2LWOauG[1]](https://www.deepdotweb.com/wp-content/uploads/2015/02/2LWOauG1.png)
After this is completed, you are going to want to edit the
[cc lang=”bash” escaped=”true” width=”600″]
/etc/apt/sources.list
[/cc]
with your favourite editor, and add the following lines.
[cc lang=”bash” escaped=”true” width=”600″]
deb http://deb.torproject.org/torproject.org trusty main
deb-src http://deb.torproject.org/torproject.org trusty main
[/cc]
After you have added those two lines into the sources list, copy, paste, and run the following two lines separately as two different commands. It’s very important that you copy and paste each line correctly.
[cc lang=”bash” escaped=”true” width=”600″]
gpg –keyserver keys.gnupg.net –recv 886DDD89
gpg –export A3C4F0F979CAA22CDBA8F512EE8CBC9E886DDD89 | sudo apt-key add –
[/cc]
Once you have ran those two commands, run one more apt-get update && apt-get upgrade command, and then finally, we are ready to install the latest stable version of Tor!
[cc lang=”bash” escaped=”true” width=”600″]
sudo apt-get update && sudo apt-get upgrade;
apt-get install tor deb.torproject.org-keyring;
[/cc]
Tor is now installed, and we are ready to get down and dirty with configuring and starting your Tor node. Make sure that Tor is not running before we begin to make any changes to the torrc file, or the changes will not take place. To do this, make sure you run the following command.
[cc lang=”bash” escaped=”true” width=”600″]
sudo service tor stop
[/cc]
Once that is done, we can use our favourite editor to edit the magic file known as “torrc”, located in the
[cc lang=”bash” escaped=”true” width=”600″]
vim /etc/tor/torrc
[/cc]
folder on our VPS. This file contains all of the options to run Tor as a hidden service, as a bridge, and for today’s tutorial, a Tor relay.
We want to scroll down in this file until we see the information stating that the section is just for Tor relays. It will look something like this.
![4kdKUk1[1]](https://www.deepdotweb.com/wp-content/uploads/2015/02/4kdKUk11.png)
It is also worth noting that I will be going down the list of configuration options out of order, since some of the options are not really needed for this tutorial.
The picture is just the first few settings in the options for our Tor relay, but don’t get overwhelmed. It’s really simple when you take your time and read through it.
The first setting we will be dealing with is the “ORPort”. This is the port that will accept connections from clients so they can use the Tor network. It is a required option, and the default selection of 9001 is the optimal way to run it. Remove the # from the front of it to make it active.
[cc lang=”bash” escaped=”true” width=”600″]
ORPort 9001
[/cc]
The rest of the options under it can be ignored, as they are used for specific configurations.
![tJGTxF6[1]](httpd://www.deepdotweb.com/wp-content/uploads/2015/02/tJGTxF61.png)
The second setting we will be dealing with is the “Nickname” setting.
[cc lang=”bash” escaped=”true” width=”600″]
Nickname dude
[/cc]
This is only a name for the relay you are making for you to keep track of it, and for other people to know who runs it. It can be anything you want.
![]()
The next two settings we will be relating to your bandwidth. These are very important to set correctly, otherwise you may end up in trouble with your hosting provider.
Be sure you know your limits before setting up a Tor relay in the first place.
RelayBandwidthRate is the base line of how much bandwidth you want to allow people to use off of your relay. RelayBandwidthBurst is how much bandwidth you want to allow in one quick burst to and from a client. This does not cap the bandwidth you use outside of the Tor applications on your VPS. The default settings for both of these are usually fine. You can adjust them up or down as you need or want though.
[cc lang=”bash” escaped=”true” width=”600″]
RelayBandwidthRate 100 KBytes # Throttle traffic to 100KB/s (800Kbps)
RelayBandwidthBurst 200 KBytes # But allow bursts up to 200KB (1600Kb)
## Use these to restrict the maximum traffic per day, week, or month.
## Note that this threshold applies separately to sent and received bytes,
## not to their sum: setting “40 GB” may allow up to 80 GB total before
## hibernating.
##
## Set a maximum of 40 gigabytes each way per period.
AccountingMax 4 GBytes
## Each period starts daily at midnight (AccountingMax is per day)
AccountingStart day 00:00
[/cc]
![4fdUtWp[1]](http://www.deepdotweb.com/wp-content/uploads/2015/02/4fdUtWp1.png)
AccountingMax is the total amount of data you want to be sent in a given period of time.
This could be 10 gigabytes of data in a 24 hour period, for example. AccountingStart is when that period of time starts for your relay.
In the example below, I will set it so that only 10 gigabytes of data can be sent in a 24 hour period. Again, this can be set up or down to your wants or needs.
![4CcGo5r[1]](http://www.deepdotweb.com/wp-content/uploads/2015/02/4CcGo5r1.png)
The next setting is your contact information. This can be as simple as an email address, or as advanced as your PGP key, but using an email address is absolutely recommended to get you on the Tor mailing list. Usually, people put there email address, followed by their BitCoin address just in case someone wants to donate BitCoins to that relay, as shown in the example below.
[cc lang=”bash” escaped=”true” width=”600″]
ContactInfo dude
[/cc]
![PWHBTf0[1]](http://www.deepdotweb.com/wp-content/uploads/2015/02/PWHBTf01.png)
The final option is an important option.
It is the decision as to if you want to be an exit node or not.
Being an exit node is important to the Tor network, as it is where encrypted Tor traffic gets into the internet.
For more information, click here.
You don’t hurt the Tor network by not being an exit node at all, so it is no worry if you want do not want to be.
Just uncomment the last ExitPolicy option I did in the picture.
If you do want to be an exit node, leave all of them commented just like they are.
[cc lang=”bash” escaped=”true” width=”600″]
ExitPolicy reject *:* # no exits allowed
[/cc]
![1unQhB5[1]](http://www.deepdotweb.com/wp-content/uploads/2015/02/1unQhB51.png)
Make shure your firewall does not reject traffic to TCP port 9001!
Once you make sure everything is to your liking, start up Tor again with the command below, voila!
You are running your own Tor relay, heloing users around the world have safer and more anonymous internet!
|
1
|
sudo service tor start
|
A few things to keep in mind that are not really listed in any help file before we end the tutorial.
One, is that your relay may not be listed for a few hours on sites like Globe or Atlas. It takes a bit. Don’t go restarting your VPS or anything.
The second thing is that your bandwidth is going to be really screwy for awhile.
It will jump up, it will go down to nothing, it will even out, and even sometimes go COMPLETELY INSANE like it did for me the first time I ran a Tor node. It’s entirely natural, and I recommend you take a look at this article for more reading on what to expect.
Another thing is that there is a community established that is ready to help you if you have any trouble at all. Stackexchange is a website dedicated to people who are having problems with a wide array of subjects, and Tor is one of them! It can be accessed at this link, 24 hours a day, 7 days a week, 365 days a year.
The last thing I can think of is that logs are your friend. If there is anything going wrong with your relay, it will be located in the log files at /var/log/tor. Read them, find out where the problem is, and fix it. If you need some help, use the Stackexchange link above
Well, this about covers the tutorial on how to host your own Tor relay. If you have any questions, feel free to ask them in the comments below.
Thank you all so much, and thank you for your interest in helping the Tor community.
This tutorial is by Dave, who can be reached at [email protected]
Make shure Tor Service starts on Server boot/reboot
[cc lang=”bash” escaped=”true” width=”600″]
update-rc.d service enable; # enable autostart for tor service on debian7-8
[/cc]
For different systems it might need different commands.
[cc lang=”bash” escaped=”true” width=”600″]
cat /var/log/tor/log; # watch what tor is doing
Apr 26 00:14:31.000 [notice] Bootstrapped 80%: Connecting to the Tor network
Apr 26 00:14:31.000 [notice] Bootstrapped 85%: Finishing handshake with first hop
Apr 26 00:14:31.000 [notice] Bootstrapped 90%: Establishing a Tor circuit
Apr 26 00:14:31.000 [notice] Tor has successfully opened a circuit. Looks like client functionality is working.
Apr 26 00:14:31.000 [notice] Bootstrapped 100%: Done
Apr 26 00:14:31.000 [notice] Now checking whether ORPort 78.47.157.226:9001 is reachable… (this may take up to 20 minutes — look for log messages indicating success)
Apr 26 00:14:32.000 [notice] Self-testing indicates your ORPort is reachable from the outside. Excellent. Publishing server descriptor.
Apr 26 00:14:46.000 [notice] Performing bandwidth self-test…done.
[/cc]
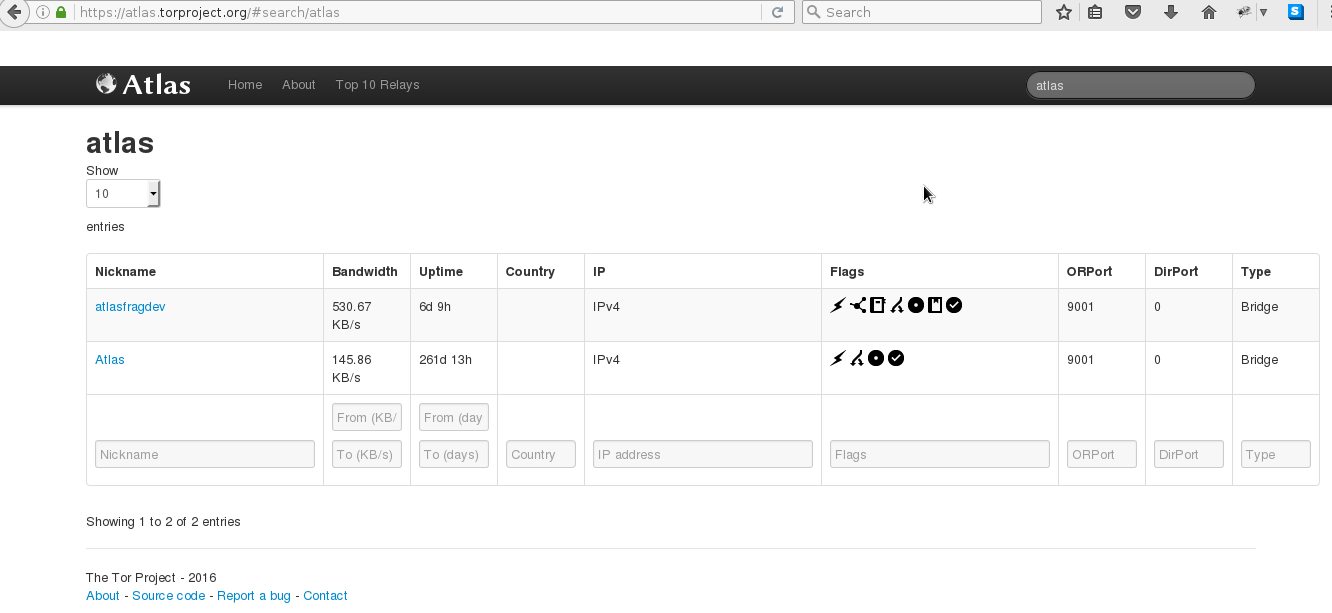
Check TorAtlas
after a few hours you should be able to “see” your tor-relay in the TorAtlas.
https://atlas.torproject.org/#search/atlas
liked this article?
- only together we can create a truly free world
- plz support dwaves to keep it up & running!
- (yes the info on the internet is (mostly) free but beer is still not free (still have to work on that))
- really really hate advertisement
- contribute: whenever a solution was found, blog about it for others to find!
- talk about, recommend & link to this blog and articles
- thanks to all who contribute!