aim:
the harddisk of a macbook has grown too small (256GB), so all data shall be transferred to a new bigger harddisk (512GB SSD)
hardware:
you will need an external harddisk and switch in your new bigger harddisk.
usb to sata adapter (dissassembled external harddisk):
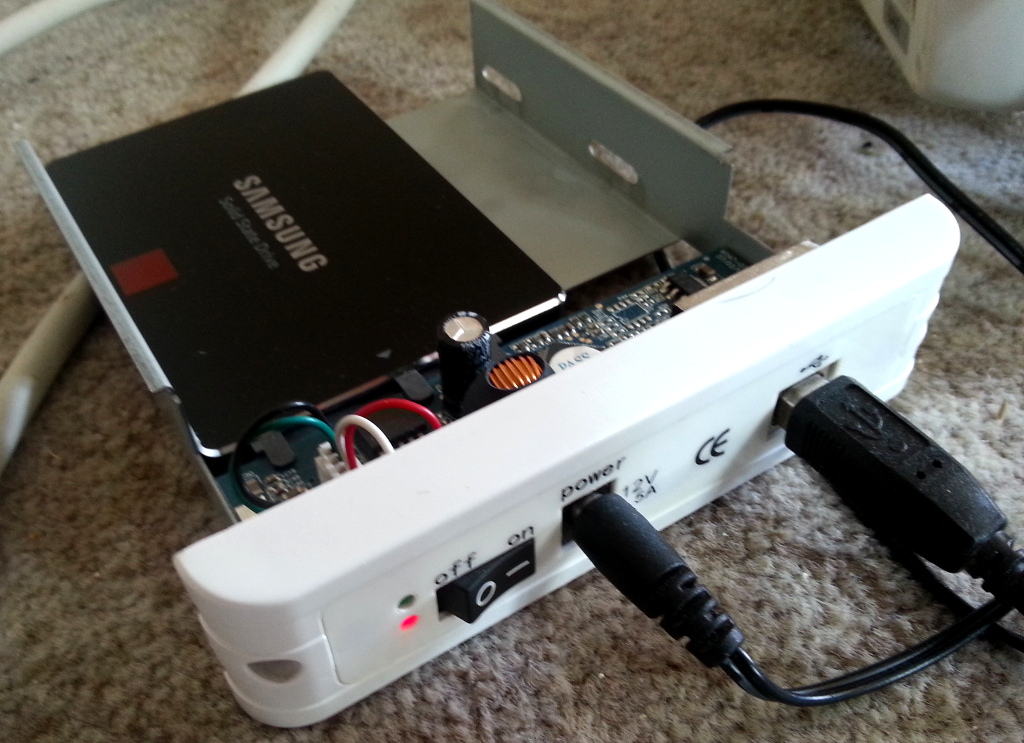
what you will also need:
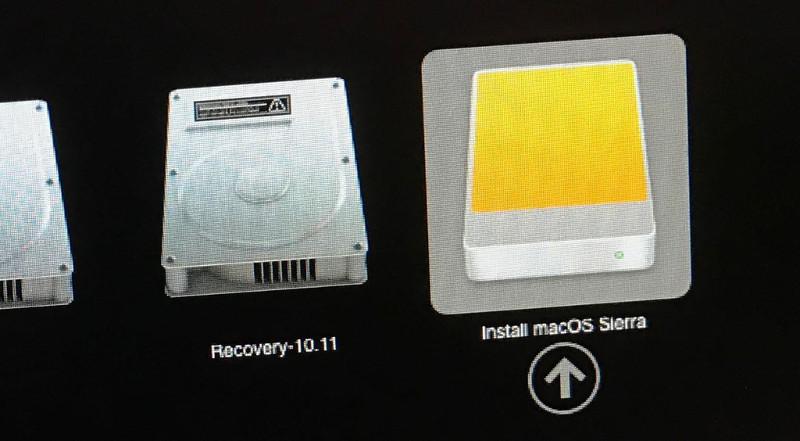
a kind of rescue environment, booting OSX from DVD or better:
having a 1:1 copy of the DVD as partition on your harddisk, so you can boot it up by holding ALT key right after you pressed power button
While i had some success booting linux on Macs, DEBIAN/UBUNTU/KNOPPIX DOES NOT WORK ON ALL MACBOOKS/iMACS!
so you will be presented at the boot up choose your device screen.
you can copy 1:1 the OSX DVD to a partition on your harddisk and boot it from there with diskutility tool.
cloning with: dd? nope! DiskUtility!
first i thought, i will clone with dd and then increase the size of the partition: FAIL: 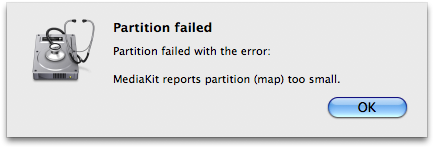
so use OSX’s DiskUtility instead, it is easy.
the diskUtility way
- attach the external SSD USB adapter
- power on Mac and IMMEDIATELY hold down ALT key until boot device screen appears
- choose OSX DVD/rescue/recovery partition (if you are connected to the internet, you can also chose to stream/download your OSX DVD on the fly and boot setup from “internet” = pretty cool!)
- start diskutility
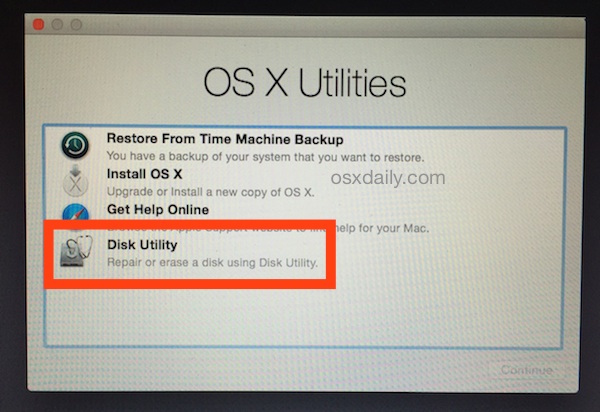
- if it is not there, search in the menu bar on top of screen.
- select your new 512GB SSD harddisk (external SSD USB adapter attached) and choose two partitions:
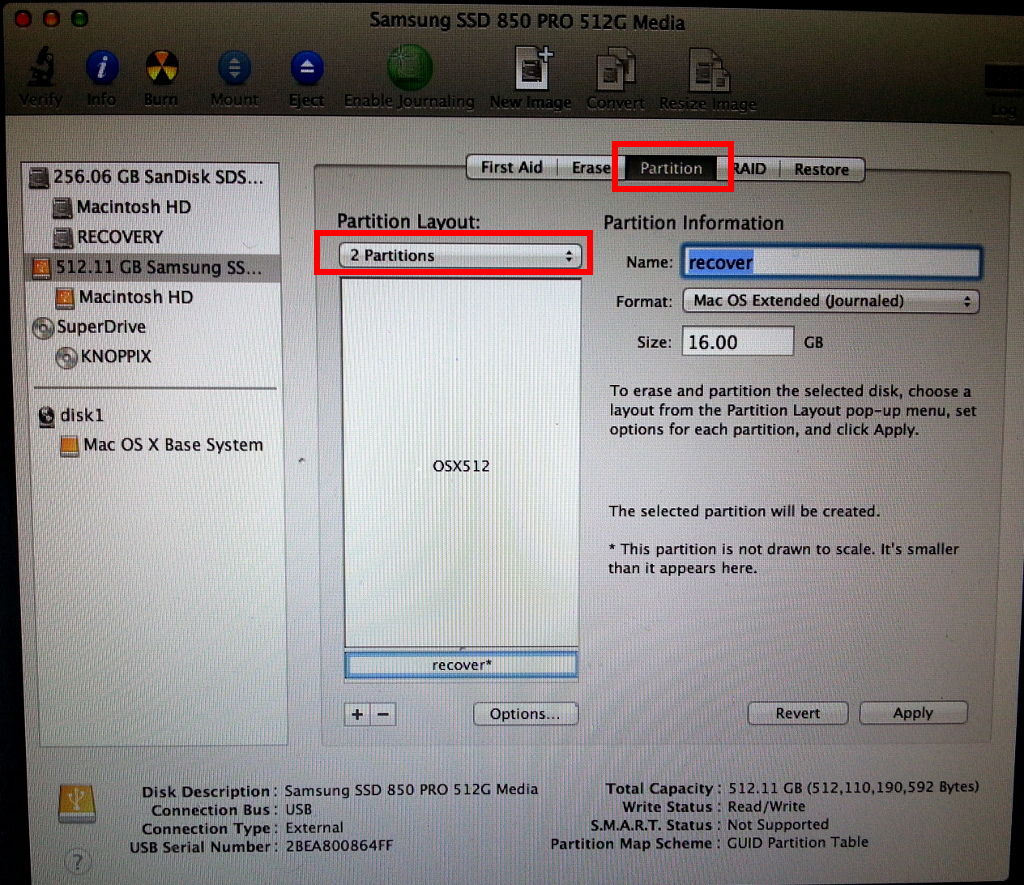
- you can name the first “OSX512”
- you can name the second “recover” or “rescue” and should be around 16GBytes in size.
- hit “Apply” when done
- now let’s start copy data to the newly created partitions:
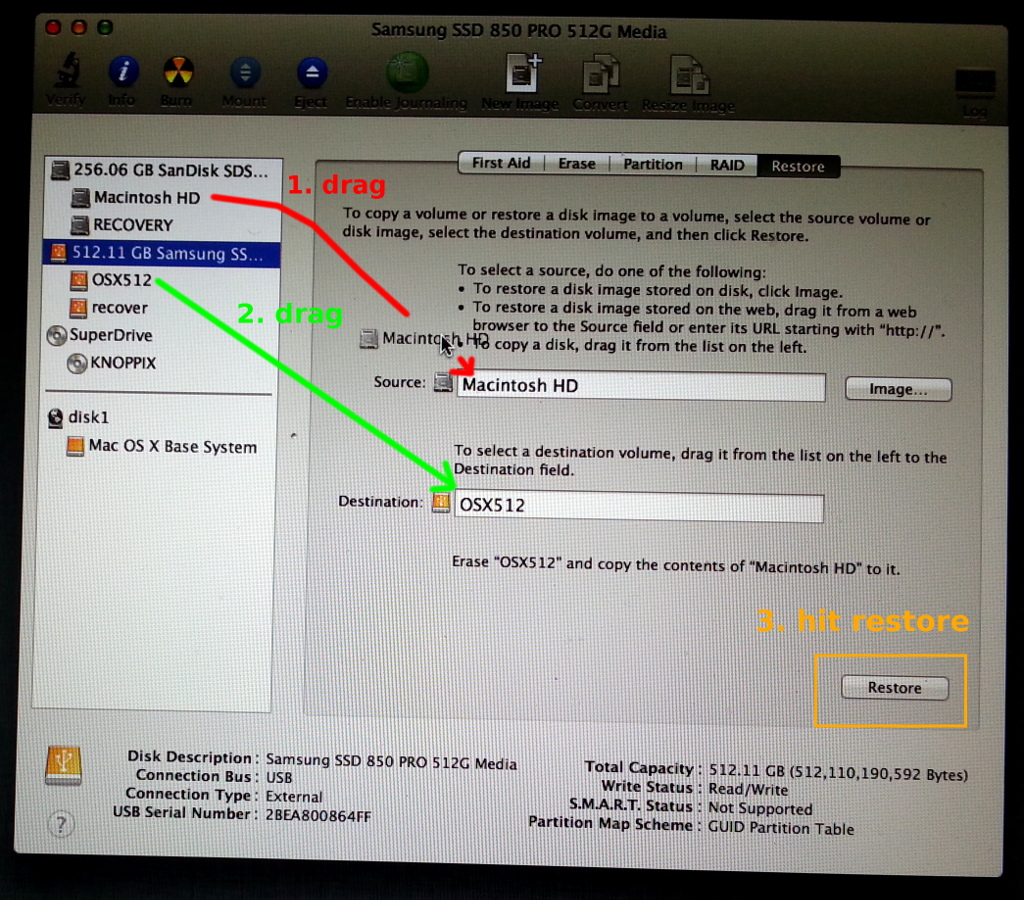
- do the same with the “RECOVER” partitions (from internal (grey) to external (orange-yellow) harddisk)
- wait…. this takes some time.
- once you are done you can do a test boot
- reboot and keep ALT pressed again
- chose the OSX512 as bootup device, it should boot up completely normal with all your data and settings and familiar desktop, except now you have more space.
- poweroff and swap the harddisks (depending on your macbook model this might be performed differently (2015 and later iMacs are THE WORST, all clue! no screw!))
- unscrew all screws on the bottom and take the plate off like in this video (MacBook Pro 13″ 2010)


- close it reboot and all should be fine 🙂
WARNING: do not bother with removing the battery!
You don’t have to! (just be careful and don’t spill any water or metal parts on your macbook while it’s open!)
the dd way
as said above: dd works but you will ran into this error during RESIZE! (this sucks!)
“gpt destroy” did nothing for me.
diskutil list

/dev/disk0
   #:                       TYPE NAME                    SIZE       IDENTIFIER
   0:      GUID_partition_scheme                        *320.1 GB   disk0
   1:                        EFI                         209.7 MB   disk0s1
   2:                  Apple_HFS Macintosh HD            319.2 GB   disk0s2
   3:                 Apple_Boot Recovery HD             650.0 MB   disk0s3
/dev/disk1
   #:                       TYPE NAME                    SIZE       IDENTIFIER
   0:      GUID_partition_scheme                        *500.1 GB   disk1
   1:                        EFI                         209.7 MB   disk1s1
   2:                  Apple_HFS Backup                  499.8 GB   disk1s2
/dev/disk2
   #:                       TYPE NAME                    SIZE       IDENTIFIER
   0:      GUID_partition_scheme                        *500.1 GB   disk2
   1:                        EFI                         209.7 MB   disk2s1
   2:                  Apple_HFS Clone                   499.8 GB   disk2s2


dd if=/dev/rdisk0 of=/dev/rdisk2 bs=1m conv=noerror,sync
If you have increased a disk size in (Snow)Leopard (via RAID or VMFS) when you try to increase the partition size in Disk Utility you will get this error:
This is because the GUID partition table (GPT) is built for the size of the drive it’s created on. And that’s a pretty logical assumption… until you consider RAID, or virtual disks.
All we need to do is remove the GPT and rebuild it. We’re not deleting the actual partition, so as long as you remember the start and size information for the partition you should be able to back-track if things get messy. I have been successful with this technique, but as always when dealing with important data – try to back up before you proceed!
Boot from your Leopard DVD
Open Utilities – Terminal…
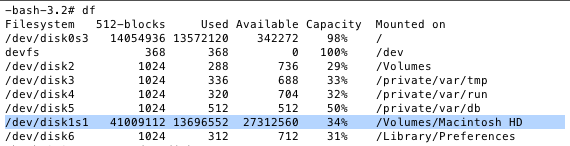
Find the disk you want to expand (mine was /dev/disk1s1, we’ll use this as an example from now on):
df
Unmount the disk
umount /dev/disk1s1
Display GPT info for the disk:
gpt show /dev/disk1
NOTE: we remove the slice number from the name (disk1s1 becomes disk1)

Note down the numbers for start and size for your partition.
Unmount the disk again.
umount /dev/disk1s1
Remove the GPT:
gpt destroy /dev/disk1
Create a new (empty) GPT:
gpt create -f /dev/disk1
Add a new entry for our disk to the GPT:
gpt add -b <start> -s <size> /dev/disk1
so in my case the command would be:
gpt add -b 409640 -s 41009112 /dev/disk1

Reboot. Now you can use Disk Utility to resize your partition without errors.
liked this article?
- only together we can create a truly free world
- plz support dwaves to keep it up & running!
- (yes the info on the internet is (mostly) free but beer is still not free (still have to work on that))
- really really hate advertisement
- contribute: whenever a solution was found, blog about it for others to find!
- talk about, recommend & link to this blog and articles
- thanks to all who contribute!